That Freekick Challenge Perks Explained
Unlock Perk Points, read each shot boost, and pick Zone or Rocket for goals.
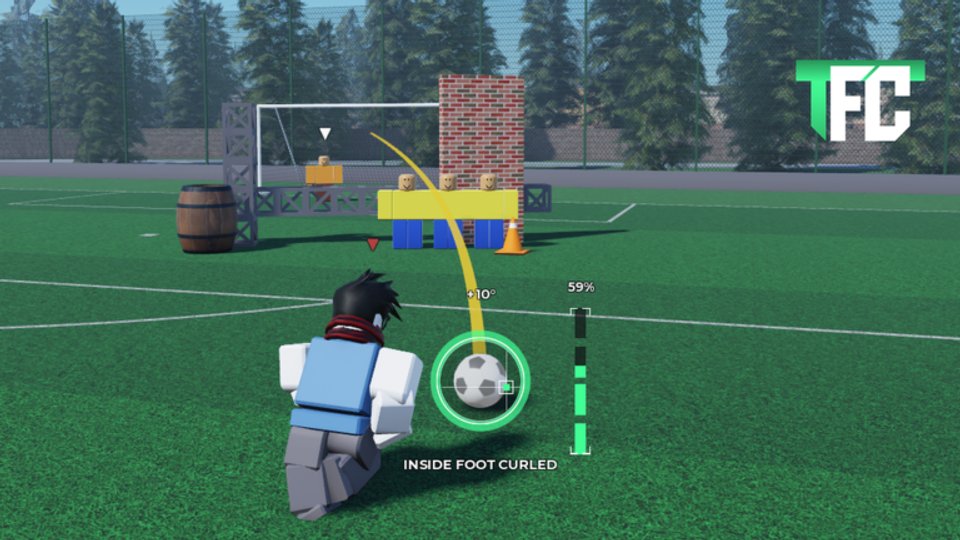
Perks are the temporary shot modifiers that sit next to your permanent card stats in That Freekick Challenge (TFC) by NelStud. Cards raise Accuracy, Precision, Power, and Curve for every kick; a perk changes one attempt so you can finish under pressure, learn a new bend, or erase a timing skill check. This guide explains how Perk Points work, what each major perk actually does (including where community numbers disagree), when to spend them, and how to practice so the boost converts into goals instead of louder misses.
If you are brand new, redeem rewards on Codes, skim Getting Started, and lock inputs on Controls. Rankings live on the Tier List; card shopping belongs on Players. Scoring and clearance recipes live in How to Score and Beat the Wall.
What perks are (and what they are not)
Before a free kick you can apply one active perk. Community write-ups often note a +2 power cooldown-style cost when a perk is used, so spam on every warm-up kick wastes the resource. Treat perks as high-stakes tools: practice the route bare, then enable the perk for the attempt that must count.
Perks do not replace aim. A Rocket shot aimed through a defender still thuds. Zone will not invent a far-post pocket if you never set INSIDE FOOT CURLED and a clear yellow line. Build the layout with Free Kick Setup first; then choose the perk that matches the miss you still see.
Always trust live in-game tooltips after NelStud patches. Guides disagree on exact Zone caps and on display names (Fire vs Chrono, Focus vs Foresight). The ranking logic below still holds when numbers move; the tooltip is the source of truth for your client.
How to unlock and spend Perk Points
Perk Points are separate from Coins. Coins buy cards that permanently lift Accuracy, Precision, Power, and Curve. Perk Points unlock or fuel the temporary shot skills. You earn them by playing and by redeeming codes — the well-known PERKSSSS code grants one Perk Point when it is still active. Open Misc → Settings, scroll to the code box, and claim every working entry listed on Codes so you do not miss the Perk Point among large Coin dumps.
Spend early points on the perk that matches your biggest failure mode:
- Thin card / random spray → prioritize Zone.
- Clean aim, slow arrivals → unlock Rocket next.
- Timing window keeps failing → Fire / Chrono.
- Cannot read bends yet → Focus / Foresight for practice sessions.
Do not dump every Coin into Power while ignoring Perk Points. A balanced card plus one well-timed Zone kick beats a glass-cannon card with no shot modifier. Cross-check priorities on the Tier List and card details on Players.
Zone — temporary all-attribute spike
Zone is the default scoring perk for most players. For that shot it temporarily pushes all four attributes — Accuracy, Precision, Power, and Curve — to a high capped value on either foot. Some community guides list the temporary values as 84; others report 99. Both describe the same idea: a short burst that maxes or near-maxes every free-kick stat at once.
Pick Zone when
- Your card is unfinished and base stats still feel thin.
- Challenge 1v1 gives you one or two high-stakes kicks and you cannot afford a wild miss.
- The wall is dense and you need Accuracy plus Curve together to bend cleanly.
- You are testing a new angle and want the result to reflect setup quality, not low attributes.
Skip Zone when you already clear walls and place the ball consistently and only need launch speed — that is Rocket territory. Zone forgives small errors; it does not teach W/S height or Q/E curl by itself. Keep practicing the mid-power INSIDE FOOT CURLED recipe from How to Score.
Rocket — launch speed without rewriting aim
Rocket multiplies launch speed so the ball leaves the foot faster. Community ranges cite about 1.3x to 1.5x. The keeper gets less time on driven or low-arc curls. Critically, Rocket does not rewrite Accuracy for you: how true the shot flies still comes from your base Power, Precision, and related Accuracy on the card.
Pick Rocket when
- Aim and timing are already solid and you only need extra pace.
- You are taking a flatter driven route where hang time hurts more than it helps.
- Zone is unavailable or cooling down and you still want an aggressive attempt.
Skip Rocket when you still mistime charges or clip the wall. Extra speed makes a bad contact fail faster. Fix height and bend with Beat the Wall before you layer Rocket.
Fire / Chrono — perfect timing at any Power
Fire (also called Chrono in some guides and UIs) grants perfect timing regardless of the Power level you choose. Normally Precision widens the timing window; this perk removes that skill check for the kick. Accuracy error still applies, so the ball can drift even when the meter is locked perfectly.
Use Fire / Chrono while you learn high-Power ranges, or when you understand aim and curve but keep missing the timing indicator under nerves. Skip it when your misses are wall collisions or wide posts — those need setup work and Accuracy / Curve, not a free timing lock.
Focus / Foresight — extra grey power-following guide
Focus (also called Foresight) adds a second grey guide that follows your power so you can visualize the curve path more clearly while charging. It does not predict wind or random error; the live ball can still leave the grey line.
Pick Focus / Foresight in practice when you change Power often and need the preview to track those changes, or when you are dialing a new free-kick setup. Skip it in high-stakes challenge kicks once you already read the primary yellow guide well — Zone or Rocket converts better on a known route.
When to pick each perk (quick matrix)
| Situation | Best perk | Why |
|---|---|---|
| New account / thin card | Zone | All four attrs jump together |
| Known curl, need pace | Rocket | Launch speed on a clean line |
| Timing keeps failing | Fire / Chrono | Perfect timing; Accuracy error remains |
| Learning wall bends | Focus / Foresight | Extra grey guide for practice |
| One-kick challenge duel | Zone | Lowest variance finish |
Confirm names and costs in your client. After patches, re-check Updates and tooltips before you trust an old screenshot.
Practice loop that makes Perk Points matter
- Freeze ball, wall, and keeper in Free Kick Setup.
- Take three kicks without a perk. Note whether the miss was timing, wall, height, or keeper reach.
- Apply the perk that fixes that miss class — not the flashiest name.
- Retest the same angle three times before changing layout or Power band.
- Only then spend Coins on a card upgrade that supports the perk (Precision and Accuracy for Rocket; Curve for Focus practice; balanced spread for Zone).
This loop stops you from blaming the perk when the yellow line still clips a defender. Pair it with Controls so charge, Q/E curl, and W/S height stay automatic under the boost.
Cards, Coins, and perks together
Perks win individual kicks; cards win the grind. Spend Coins on cards that raise the four attributes you lean on, and keep Perk Points for the modifier that matches your session goal. Beginners should prioritize Precision and Accuracy on cards so Zone has a clean base; challenge players lean Accuracy and Curve, then Power, so Rocket arrivals stay on frame. Full shopping notes live on Players; priority snapshots live on the Tier List.
Redeem codes early so PERKSSSS-style Perk Point rewards are not left behind while you chase Coin piles. Browse the Guides hub for sibling tutorials, Scripts if you explore community tools carefully, and the Wiki overview for site map links.
Sibling guides
- Getting Started — first-hour checklist and early Zone advice.
- How to Score — mid-power INSIDE FOOT CURLED finish.
- Beat the Wall — clearance before any Rocket attempt.
- Free Kick Setup — fair frozen layouts for perk tests.
- Controls — charge, curl, height, and camera keys.
Master the bare route, then spend Perk Points on purpose. Zone for reliability, Rocket for pace, Fire / Chrono for timing noise, Focus / Foresight for learning bends — that is how That Freekick Challenge perks turn practice into challenge 1v1 finishes.
Frequently Asked Questions
Quick answers to the most common questions.
What are perks in That Freekick Challenge?
Perks are temporary shot modifiers you apply before a free kick. They change one attempt (attributes, launch speed, timing, or guides) while cards permanently raise Accuracy, Precision, Power, and Curve.
How do I get Perk Points?
Earn Perk Points by playing and by redeeming codes such as PERKSSSS when active. Open Misc → Settings, scroll to the code box, and claim every working code listed on the Codes hub.
Does Zone set stats to 84 or 99?
Community guides disagree—some list 84, others 99. Both describe a temporary high cap of all four attributes on either foot. Always trust the live perk tooltip after updates.
Should I always use Rocket for scoring?
No. Rocket boosts launch speed about 1.3x–1.5x but leaves accuracy tied to your base Power and Precision. Use it when aim is already clean; pick Zone when you need a safer all-stat boost.
Are Fire and Chrono the same? What about Focus and Foresight?
Different guides and UIs use different names for matching effects: Fire/Chrono grants perfect timing at any Power (Accuracy error remains); Focus/Foresight adds an extra grey guide that follows power without predicting wind or random error.
Do perks cost anything when I activate them?
Community guides often note a +2 power cooldown-style cost when a perk is used. Save the perk for attempts that matter instead of spending it on every warm-up kick.