That Freekick Challenge How to Beat the Keeper in TFC
Read the open side, curl inside the post, and separate miss types until saves stop.
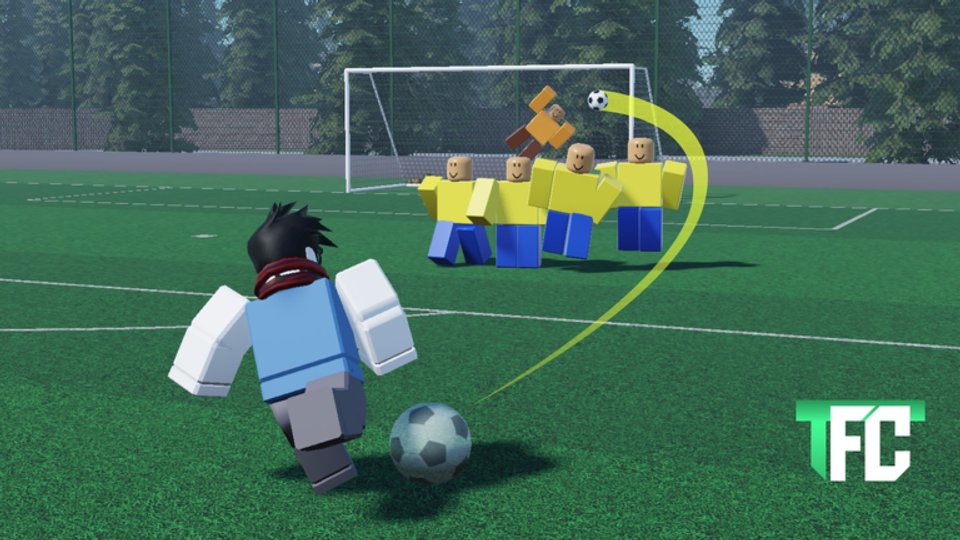
Clearing the wall is only half the job. In That Freekick Challenge, the goalkeeper is the second problem: a clean arc that still lands in gloves wastes the same attempt as a wall collision. This guide teaches a keeper-first read after every clearance, a far-post curl finish in the 60–65% power band, and a miss-class system so you fix one failure type at a time instead of spinning every dial.
If defenders still eat your shot, finish Beat the Wall first. Lock the scoring recipe in How to Score, build fair layouts with Free Kick Setup, and confirm keys in Controls. New players should start at Getting Started and redeem Codes for Coins and Perk Points.
Keeper after wall — the order that sticks
Treat the kick as a two-stage route:
- Wall stage — yellow line clears torsos and arms.
- Keeper stage — final target sits in the open post pocket, not the keeper’s chest.
Do not merge the stages. Raising Power to “beat the keeper” while the preview still clips a defender only recreates a louder wall hit. Raise, open a lane, and bend for clearance using the wall guide; only then ask where the gloves are shading.
Read the keeper before every kick
Spend one deliberate second on position before you hold Space or Left Mouse Button.
- Near-post shade — curl to the far post with INSIDE FOOT CURLED.
- Far-post shade — attack the near pocket with a shorter bend or a slightly tighter angle.
- Central set — pick either post pocket and aim just inside the woodwork; never blast the middle of a set keeper.
- Early dive habit — if practice shows they commit early, a mid-power curl that arrives after the dive can punish the empty side.
Write the open side in your head (“far post”) before you touch Q / E. Skipping the read is how central saves feel “random.”
Aim just inside the post — not the top corner fantasy
Top corners look stylish and can work, but excess Power or loft turns them into sails over the bar. The reliable learner target is just inside a post at mid height: deep enough that a small curl error still stays in the frame, low enough that Curve finishes before the ball climbs out.
Practical recipe once the wall is clear:
- Confirm shot label INSIDE FOOT CURLED (Left Ctrl).
- Point the yellow guide toward the open post pocket.
- Add Q / E curl so the path starts outside or near the wall edge and bends back inside the post.
- Charge to the 60–65% power band and release.
- Change only one dial on the next miss.
That band gives Curve time to complete the bend without amplifying tiny aim errors into wide or high misses.
Separate miss types — fix one class
Stop saying “I missed.” Name the class, then apply one fix.
| Miss class | What you saw | One change |
|---|---|---|
| Wide | Ball past the post | Aim deeper inside the frame or reduce extreme curl |
| High | Over the bar / crossbar | Drop power toward 60% or lower W / S loft |
| Blocked | Wall or defender contact | Return to wall fixes — raise arc, open lane, then curl |
| Saved | Keeper held or parried a reachable ball | Attack the open side; stop targeting center |
Blocked misses are wall problems wearing a keeper costume — do not “fix” them with Rocket. Saved misses are placement problems; move the target, do not only add Power. Wide and high are frame problems; pull ambition back inside the posts before you touch perks.
Zone and Rocket after the route is clean
Perks amplify a finished route; they do not invent one. Once clearances and open-side aims are honest:
- Zone — lifts Accuracy, Precision, Power, and Curve together for the shot. Best when small timing or aim wobble still spoils otherwise good lines.
- Rocket — multiplies launch pace so a clean aim arrives sooner. Use Rocket after you can already place the ball; Rocket on a central or wall-bound line just fails faster.
Spend Coins on cards with usable Curve and Accuracy if you live on curling finishes. Compare options on Players, rank notes on the Tier List, and deeper perk habits on Perks. Codes remain the fastest path to Perk Points when you need another unlock.
Practice drill: freeze wall and keeper
- Place a standard wall and a set keeper. Do not move them for the whole set.
- Reset with R between kicks so angle memory stays fair.
- Hold mid power. Change only target side or a slight curl amount each miss.
- Score three attempts that clear the wall and threaten the open post — goals preferred, but honest near-misses inside the frame count as placement reps.
- Only after that streak, introduce Zone or Rocket and re-test the same frozen layout.
This drill mirrors the discipline in Free Kick Setup: one variable, frozen humans, honest notes. Browse all related lessons from the Guides hub when you need a sibling page.
Challenge 1v1: five-second keeper read
In challenge mode the clock compresses your habits. Pre-bake a default: INSIDE FOOT CURLED, 60–65% power, far-post pocket unless the keeper already sits there. On your turn:
- Use up to five seconds to read keeper shading and wall density.
- Pick open side out loud in your head.
- Execute the default with at most one micro-adjustment to height or curl.
- Do not invent a max-power top-corner knuckleball mid-duel unless that exact setup is already muscle memory offline.
Longer decision trees collapse under countdown. Short reads plus a practiced route beat clever improvisation. Mode flow and pressure habits expand in Challenge Mode. After physics patches, re-run the freeze drill and check Updates before you queue again.
Sibling guides and hubs
- Getting Started — first-hour path and fair practice.
- Controls — charge, Q/E curl, W/S height, R reset.
- Free Kick Setup — target-first layouts and frozen tests.
- How to Score — full inside-foot scoring recipe.
- Beat the Wall — clearance before keeper work.
- Perks — Zone, Rocket, and Perk Points priorities.
- Challenge Mode — 1v1 timing and pressure habits.
Also use Codes, the Tier List, Players, Updates, and the Wiki overview. NelStud’s That Freekick Challenge rewards players who clear humans, then beat gloves on purpose — read the open side, curl just inside the post, stay in the mid-power band, and fix one miss class at a time.
Frequently Asked Questions
Quick answers to the most common questions.
I clear the wall but the keeper always saves. What should I change?
Read keeper shading before the kick and aim just inside the open post with INSIDE FOOT CURLED. Stop targeting the center of a set goalkeeper.
Should I aim for the top corner every time?
Not while learning. Top corners punish excess Power and loft. Prefer just inside a post at mid height in the 60–65% band, then raise ambition only after that finish is consistent.
How do I know whether a miss was wide, high, blocked, or saved?
Wide leaves the frame beside a post; high clears the bar; blocked hits the wall or a defender; saved is a reachable ball the keeper holds or parries. Fix only that class on the next kick.
When should I use Zone versus Rocket against the keeper?
Use Zone when small aim or timing errors still spoil good routes. Use Rocket only after placement is clean and you want the ball to arrive faster into the open pocket.
What practice drill improves keeper finishes without changing everything?
Freeze wall and keeper, reset with R, hold mid power, and change only target side or slight curl until you string three honest open-post threats.
How long should I study the keeper in challenge 1v1?
About five seconds: note shading, pick the open side, then run your default INSIDE FOOT CURLED mid-power route with at most one micro-adjustment.